One-derful meals

img_0004

Thin spaghetti cooks in the Simple Spaghetti sauce and thickens it in the process.

I don’t like to cook pasta in a big pot of boiling water.

Maybe it’s because it steams up my kitchen, although the humidity is actually a benefit during these cold Minnesota winter days.

Maybe it’s because I have an electric stove and it seems to take forever to get the water boiling.

But the real reason is that cooking pasta requires an extra pot, and that extra pot has to be washed.

There is no dishwasher in our compact kitchen. There wasn’t one when we moved into our home more than 25 years ago, and when we remodeled, it meant sacrificing cupboard space to add one.

And since there are only two in our household, a dishwasher doesn’t seem like a necessity. If I cook, Hubby Bryan is the dishwasher, and when he cooks, I fill that role.

So we try to keep the number of pots and pans used to a minimum.

That’s why I love one-pot wonders — recipes that can be made from start to finish in one pan. In the case of the recipe that follows, that means that the pasta cooks right in the sauce, so no need for a big pot of boiling water. And while it cooks, the starch from the pasta helps to thicken the sauce.

I have several such recipes in my repertoire, and I plan to share them in the next couple of blogs.

The first one is a true oldie-but-goodie. It dates back to my early days of cooking, found in a kids cookbook that I checked out from West Elementary School. It became a supper  staple in the Rickers’ kitchen.

I have looked in many antique stores for that same kiddie cookbook — it was Pillsbury or Betty Crocker or Better Homes & Gardens, I believe — but have never stumbled across a copy again. So this recipe is totally from my memory.

img_0030

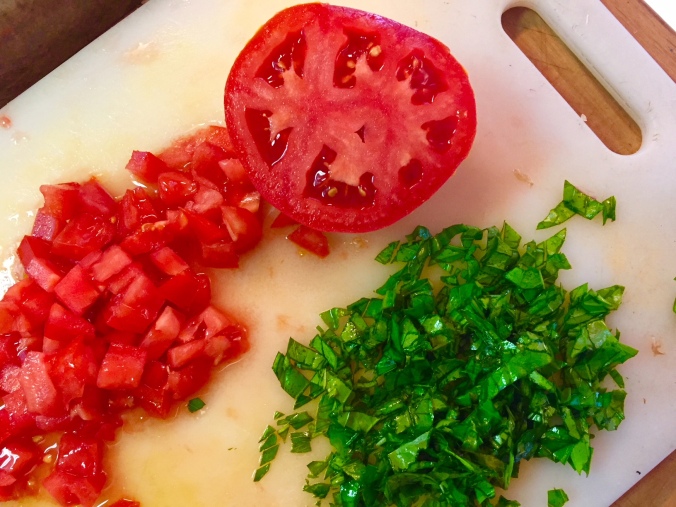
The key to this recipe is the seasoning, specifically the basil. When I have basil available in the garden, I add fresh shreds of it during the last few minutes of cooking. But this time of year, I rely on a combination of frozen basil (the fresh leaves rolled into cylinders and wrapped in plastic wrap and freezer bags for later consumption, see photo above right) and dried. But the original recipe calls for dried basil, and I add it liberally for the best flavor.

I like to serve this one-pot pasta with an equally simple salad on the side.

Simple Spaghetti

1 pound ground beef

1 small onion, chopped

1 clove garlic, minced

Two 8-ounce cans tomato sauce

4 ounces mushrooms, sliced (optional)

1½ teaspoons dried basil

Seasoned salt and pepper to taste

4 ounces thin spaghetti or vermicelli

In a large saucepan, brown the ground beef with the onion and garlic. Stir in the tomato sauce, and then add the same amount of water, rinsing out the cans in the process. Add the seasonings and mushrooms, if using.

Bring the mixture to a low boil and add the pasta, breaking it up into fourths before adding to the pot. Continue to cook at a good simmer, until the pasta is tender and has absorbed the excess liquid.

Makes 4 servings.

A new gratitude

IMG_0087

Back in September, when the pumpkins and gourds first started showing up in the markets, I picked out a nice white pumpkin for a special project.

I found the idea for a “Gratitude Pumpkin” and decided it was a good idea because I knew I had some health challenges ahead of me and would need to stay focused on the positive things in my life. So I put the pumpkin on the kitchen table along with a cup of Sharpie markers and tried each day to write one or two things for which I was grateful.

Shortly thereafter, I had major surgery and probably wasn’t as diligent about my pumpkin notations as I should have been. Once in a while I’d add some new words, but it didn’t fill up too fast.

Fast-forward to the present. I recently suffered a health setback and spent five days in the hospital. I came home and filled out a good chunk of the pumpkin, making one word very prominent in the middle of the gourd.

HOME!

Yes, at the moment I am most grateful to be home. I had amazing care during my stint at the local hospital and came out with a new appreciation for our local facility and not having to travel 60 miles to get that care.

IMG_0090But there really is no place like home.

The pumpkin has turned out to be a good way to count my blessings, both large and small. It includes people like my fabulous spouse, Hubby Bryan, family, friends and hospital caregivers. It also includes some of the things we take for granted every day, like staplers, black pepper and rubber spatulas, as well as a few offbeat  things, like “the guitar wizardry of Carlos Santana” and “winning lottery tickets,” even though I’m not a frequent player and never win.

And not surprisingly, there are quite a few food references.

With Thanksgiving on the horizon, of course my two favorite feast recipes made the pumpkin: Slow Cooker Stuffing and Refrigerator Mashed Potatoes.

Yes, here they come again, since I am still determined to get everyone out there to see the wisdom of cooking the stuffing/dressing in the slow cooker and making the potatoes ahead.

Not only are these recipes time and oven-space savers, they are absolutely delicious. Most people who have tried these say they will never go back to the conventional stuffing and potato recipes.

Happy Thanksgiving, dear readers. I count you among my many blessings, too. Thanks for Mixing and Musing along with me.

Slow Cooker Stuffing

In 1 cup butter, saute 1 cup chopped onion and 2 cups chopped celery. Remove mixture from stove and stir in 1 teaspoon poultry seasoning and 2 teaspoons dried sage.

In a large bowl, combine 12 cups dried bread pieces with the butter-vegetable mixture.

Beat 2 eggs and combine with 3 to 4 cups chicken broth; pour over bread and stir well to combine.

Place mixture in slow cooker and cook on low for 4 hours. (I turn it up to high for about 1 hour in order to get the crispy stuff around the edges.)

Refrigerator Mashed Potatoes

Peel 5 pounds (10 large) potatoes and cook in boiling salted water until tender; drain. Mash until smooth (no lumps).

Add 6 ounces cream cheese (or lower fat Neufchatel), 1 cup dairy sour cream (I prefer the light version or Greek yogurt), 2 teaspoons onion salt, 1 teaspoon salt and ¼ teaspoon pepper. Beat until light and fluffy. Cool. Cover and place in refrigerator.

May be used anytime within 10 days. Place desired amount in a greased casserole, dot with butter and bake in 350 degree oven until heated through, 30 to 60 minutes, depending on size of dish.

Pick a peck of peppers?

IMG_0020

The weather forecast is not favorable for continued garden production. Frost is on its way, and I’ve noted social media pleas for ideas to preserve the peppers that are still hanging on the vines.

I came across this recipe for a sweet-hot relish and immediately thought of a similar product that we’ve bought at the Omaha Farmers Market — candied jalapeno slices that I chop up and mix into cream cheese and plain Greek yogurt for a tangy dip.

In this method, the jalapenos are pre-chopped, and they’re not quite candied, but there’s enough sugar to provide that satisfying sweet-hot flavor. Hubby Bryan — who loves anything spicy — has been gobbling these up, putting them on just about everything he eats. I’d call that a ringing endorsement for my efforts.

Preparing the peppers is the most labor-intensive part of this recipe. If you like extra heat like HB, leave the ribs and seeds in. Be sure to wear gloves when chopping hot peppers, and don’t touch your eyes.

Hot and Sweet Pepper Relish

20 jalapenos or other small hot peppers

Other assorted peppers as available (I like to use some red, orange or yellow pepper for color interest.)

1 large clove garlic

1 cup white vinegar

½ cup water

1 cup sugar

½ teaspoon celery salt

½ teaspoon kosher salt

Seed and devein the jalapenos and other peppers; chop into a small dice. Mince or run the garlic through a press and add to the pepper mixture. Spoon the peppers into into a glass jar or jars; do not pack.

In a saucepan, heat the vinegar, water, sugar, celery salt and salt until boiling and the sugar is dissolved. Remove from heat and let sit for two minutes.

Pour liquid into the pepper-filled jars and screw on the lids. Allow to cool to room temperature, then place in the refrigerator. Wait a few days for the flavors to fully develop before using.


A match made in the garden

IMG_3209

In early February, a pesky little varmint supposedly pops his head out of his burrow and determines if we are going to have an early spring or are doomed to six more weeks of winter.

I wish there was a groundhog that would predict six more weeks of summer instead. Or maybe we could make it a more tropical animal — a flamingo, perhaps? — that would make such a prophecy.

If you haven’t figured it out yet, I’m not ready for summer to be over. I feel like it barely got started. I still have so much I want to do while it’s sunny and warm outside. I’m not ready for the shortening of the sunlight and the cool evenings.

But I know there is nothing I can do about it, since there’s not a prognosticating flamingo out there, so I’m determined to make the best of what is left. And that includes making use of the garden bounty.

At my house, that means basil. I have a basil plant that has thrived on the combination of ample rainfall and hot, muggy days. Basil loves that kind of weather, so I have lots of green leaves to use up before it gets much cooler. I will freeze some, of course, and perhaps make up some pesto for the freezer.

But the way I like to use basil the best is with tomatoes. Tomato and basil is a match made in the garden.

And one of my favorite such combos is a pasta salad in a light lemon-garlic dressing — no mayonnaise — so it stands up to the heat and sitting out on the table at a potluck or picnic.

I actually make two versions of this salad: One uses a cheese-filled pasta product; the other has the cheese mixed in with the pasta and other ingredients. The filled-pasta version is a little more unique, but the salad is no less tasty made with non-filled pasta. It’s whichever you prefer.

Tomato-Basil Pasta Salad

One package (250 grams) cheese-filled ravioletti or half of a 16-ounce box mini farfalle pasta

1 large tomato, diced

½ cup chopped fresh basil

½ cup finely chopped onion

IMG_3211
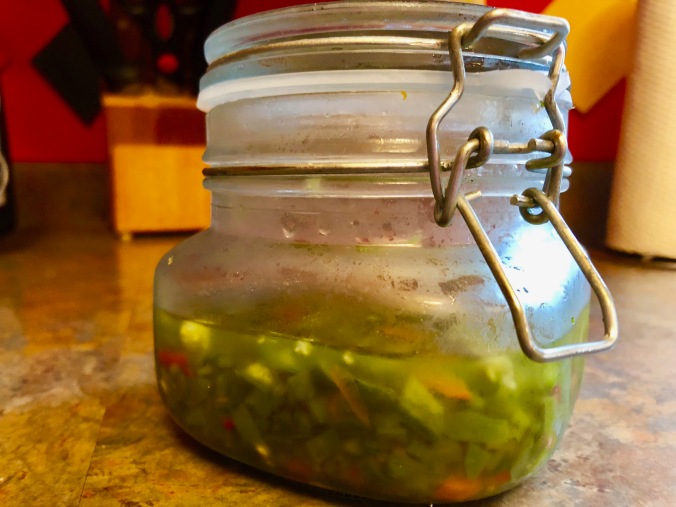
½ cup Parmesan cheese (if using farfalle)
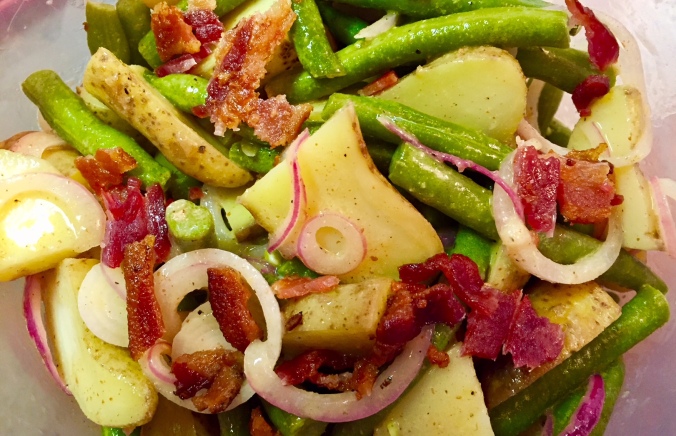
For dressing:

‘1 clove garlic, finely minced

Juice and zest of 1 lemon

1 generous tablespoon honey

⅓ cup olive oil

Salt to taste


Cook pasta according to package directions. Cool.

Whisk together the minced garlic, lemon juice and zest, honey and olive oil. Add salt to taste, keeping in mind that the Parmesan will add more salty flavor.

Combine the cooked pasta, tomato, basil and onion. Add dressing and stir to combine. Add Parmesan, if using.

This salad will keep for several days in the refrigerator. Add additional olive oil if the pasta soaks up the dressing.


A-ug(h)-ust

IMG_3170Ugh. It’s August.

Not that I have anything personal against August. I’m glad to have that last month of summer left to savor.

But what happened to the first two? June and July sped by faster than I  can ever remember. And now the days are getting shorter by 2 minutes each day, according to the TV weather forecaster. There are back-to-school supplies front and center in every store I enter. The roar of the motorcycles resounds from Interstate 90 as the bikers go back and forth to the annual motorcycle rally in the Black Hills of South Dakota.

Yes, August is definitely here (sigh), and I’m sure it will go just as fast as its two predecessors. And that gets me a bit depressed.

Depressed.

Depressing

Depression

Depression Dish.

Ah, yes. Depression Dish, pictured above. One of the bright spots in the last month of summer, as it features some of the stars of the garden bounty.

Green beans. New potatoes. Onions.

And then you top it all off with a plethora of bacon, and you have a whole lot of yum.

Why is it called Depression Dish? There’s certainly nothing depressing about it. But my guess would be that it was popular during the Depression era, as it used fresh garden goods to stretch a small amount of meat, bacon in this case, into a meal. But that’s only my hypothesis.

In my mom’s “Mixing & Musing Cookbook,” she refers to it as Old-Fashioned Green Beans and Potatoes. But I prefer to call it Not-So-Depressing Green Beans and Potatoes. First, I will give you the skillet made version as it appears in the cookbook. Below you will find some notes as to how I have updated it a bit.

Not-So-Depressing Green Beans and Potatoes

4 strips bacon, diced

4 cups fresh green beans, trimmed and halved

1 cup water

1/4 teaspoon salt

1/8 teaspoon pepper

1 cup diced potatoes

3/4 cup sliced green onions

In a large skillet, cook diced bacon for 5 minutes or so, until almost crisp. Drain off part of the bacon drippings. Stir in green beans, water, salt and pepper. Simmer 2 or 3 minutes. Add potatoes and onions. Simmer about 15 minutes, until potatoes and beans are tender.

My variation: I cook the beans and potatoes (new potatoes, quartered, with skins still on) separately in the microwave until tender. Hubby Bryan cooks the bacon on a foil-lined sheet pan on the grill, reserving some of the bacon fat. Then I stir it all together with thinly sliced spring onions (you can also cook those with the potatoes or beans in the microwave, if you want, or just leave raw).

If you want to make a warm German-potato-salad-type dish, combine the bacon fat with 1/4 cup red wine vinegar and a tablespoon of mustard before stirring it into the potato-bean-onion concoction. Otherwise just drizzle a little of the bacon fat over the veggies and season to taste.


Onion candy

IMG_3088This plate of food was supper earlier this week. An Iowa-cut pork chop, fresh green beans, red peppers and onions.

Most people would salivate over that beautifully-cooked chop — and it was delicious, grilled by Hubby Bryan. But for me the stars of the plate were the fresh veggies: the first garden-fresh green beans of the season, and those onions, also from the farmers market.

The onions have gotten to be a regular side dish at our house. They are what some would call spring onions — bigger than a green onion, but not fully formed into a big onion.

Whatever you call them, they are scrumptious. Especially the way we fix them.IMG_3075

They are like candy. Onion candy.

Here’s our method:

Remove most of the green tops and cut the spring onions in half. Place the onions on some aluminum foil — enough to wrap around them. Add a couple of dashes of soy sauce to each one, along with a sprinkling of brown sugar, probably a half teaspoon on each. Then top with a dab of butter. Pull the foil up, but don’t completely seal.

Then grill over medium-high heat for about 20 minutes.

That’s it. Onion candy. Probably some of the most delicious onions you will ever have. Great as a side dish or on top of a burger or hot dog.

I’ve also done this with Vidalia or basic yellow onions: Same method, just score move the outer layer of the onion, then score it into quarters about half way through. A few dashes of soy, a sprinkling of brown sugar, a tablespoon of butter on top. Grill.

Yum.


Stalking the ‘barb

IMG_3072
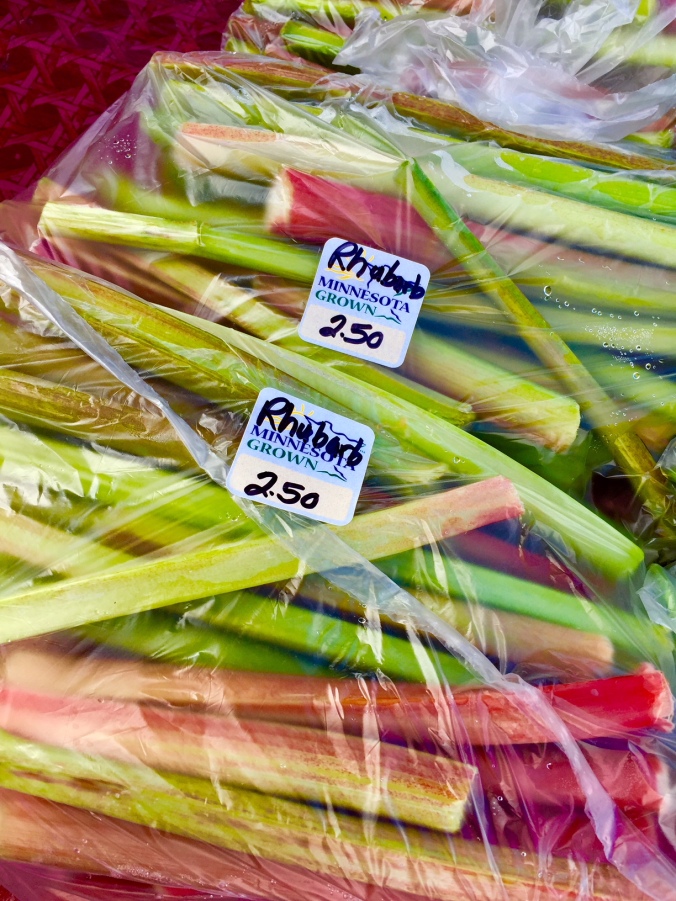
Tuesday was a banner day for me. The local farmers market opened for the season, so I hustled my way down there to see what could be had.

There were radishes, onions, lots and lots of Asian greens, strawberries, and yes, there was rhubarb.

I had wondered if the rhubarb plants were still producing locally, and there was the answer to that pondering. The rhubarb plant that used to be in our backyard was sacrificed a number of years ago for the sake of a bigger and better garage, so I just don’t have access to what is sometimes referred to as pie plant.

But if you still have rhubarb producing in your own yard, no doubt thanks to the abundance of rain we’ve been having (it can stop now, thank you!), or if a friend or neighbor has shared their ‘barb bounty, I would suggest you put it into what my mom dubbed the “Quintessential Rhubarb Dessert.” In her cookbook, it is titled Rhubarb Torte.

Quintessential Rhubarb Torte

First layer:

1 cup flour

2 tablespoons sugar

Pinch of salt

½ cup butter


Second layer:

1 ¼ cups sugar

2 tablespoons flour

⅓ cup milk

2 ¼ cups rhubarb

3 egg yolks


Third layer:

3 egg whites

6 tablespoons sugar

¼ teaspoon cream of tartar

Combine the first layer ingredients; press into an 8- by 10-inch pan. Bake at 325 for 20 minutes.

Cook the second layer ingredients until thick. Pour over baked crust.

Beat the third layer ingredients until egg whites are stiff. Spread atop cooked rhubarb mixture. Brown in 325 degree oven for 10 to 15 minutes.


Chicken Little, Chicken BIG

mohawk haan crows close up

Photo by Pixabay on Pexels.com

Tonight for supper we had steak — cooked on the grill, of course — accompanied by a lovely salad and some grilled onions.

But steak is an anomaly, something we indulge in only every so often.

More often than not, the meals at our house are based on chicken or ground beef as the proteins. So it’s important to have a ready supply of both on hand. And when it comes to chicken, it’s nice to have some precooked bird in the freezer, ready to throw in whatever is on the menu.

For instance, during the winter, Monday is soup night, and I often make up a big pot of Chicken Noodle, Chicken Tortilla or Chicken Pot Pie soup.

When the weather turns warmer, Monday becomes salad night, with a generous helping of chicken breast atop a pile of greens. (I change up the dressing — most often homemade — on a regular basis, so we don’t get tired of this combo.)

Sometimes we rely on precooked rotisserie chicken from the grocery store, but when chicken breasts go on sale, Hubby Bryan and I will cook up a big batch, either in the oven or on the grill, depending on the weather.

A number of years ago, I clipped a chicken rub recipe from a magazine, and it’s a go-to when cooking up a big batch of chicken for later use. It adds just enough flavor without being overpowering or conflicting with specific ethnic cuisines.

The original recipe says this mixture is enough to coat 16 skinless, boneless chicken breasts — about 5 pounds! We don’t usually go for quite that big a quantity, and frankly we prefer bone-in chicken breasts for both flavor and texture. But no matter how many we cook, this recipe seems to be just the right amount of rub, otherwise the excess can be stored in a covered container (just make sure none of it has been contaminated by raw chicken juices!). And even if you’re not making a BIG batch of chicken for freezing, this rub is a good option.

Chicken Big Spice Rub

¼ cup brown sugar

2 teaspoons sea salt

2 tablespoons paprika

2 teaspoons ground coriander

1 teaspoon garlic powder

1 teaspoon ground black pepper

½ teaspoon cayenne pepper

Lightly brush chicken pieces of choice with vegetable oil. Sprinkle liberally with spice rub. Refrigerate chicken for at least 30 minutes or as long as overnight.

Cook on the grill until juices run clear. If using oven, heat to 400 degrees and cook for 18-25 minutes, depending on whether you are using bone-in or boneless chicken and size of the pieces.

Let chicken cool for about 30 minutes. Debone if desired/necessary and portion out into freezer bags; or individually wrap pieces in waxed paper and store in freezer bags.

Cars and coleslaw

IMG_2071Let’s face it, the Memorial Day weekend is not typically known for beautiful weather in our part of the country. In my memories of more than five decades, I recall many more Memorial Days that were rainy and dreary than those that were sunny and hot.

But the weatherman has promised us an exceptional weekend this time around, and I intend to make the most of it.

First stop, of course, will be at the annual Memorial Day Car show at Spomer Classics in Worthington. ‘

If I had to pick out one attraction in Worthington that I think everyone should see, it would definitely be Spomer Classics. Marv Spomer, with help from his wife, Jeanine, has assembled an amazing collection of automotive and local history that is displayed sat the former auto dealership building (Koppy Motors at one time) on the western end of Oxford Street. It is something to behold, even if you are not an automotive aficionado.

Hubby Bryan is a car guy. Me, not so much. But I am enthralled every time I walk in the door of Spomer Classics. There are cars. There are signs, signs and more signs. You have to see it to believe it.

And on the Saturday of Memorial Day, the already impressive display is amplified by the car show on the museum’s grounds. There will be hundreds of cars lined up.

Go check it out from 10 a.m. to 2 p.m. Saturday at Spomer Classics, 322 Oxford St. For more information, go to www.spomerclassics.com.

With such stellar weather in store for the three-day weekend, I expect there will be many outdoor gatherings — whether planned or impromptu. That thought got me looking through my salad recipes, and this one jumped out as a possibility for toting to any cookout that might pop up on our social calendar. I believe it was shared by friends Kevin and Kami Lease, who live in the greater Madison, Wis., area.

Smoky Chipotle Coleslaw

4 cups packed green cabbage, shredded

2 cups red cabbage, shredded

7 green onions, thinly sliced

1 cup cilantro or parsley (or combination of both)

For dressing:

1/2 cup mayonnaise

1/2 cup light sour cream

3 tablespoons white vinegar

1 tablespoon molasses

1 1/2 teaspoons honey

1 small chipotle pepper, minced, plus 1 teaspoon adobo sauce from the can (more or less to taste)

1/4 teaspoon ground cumin

1 teaspoon kosher salt

Mix the dressing ingredients.

In a large bowl, toss the cabbage, green onion and 3/4 cup of the cilantro or parsley.

Pour the dressing over the salad, toss well and chill for at least 30 minutes or up to 4 hours. Scatter remaining cilantro or parsley over the top before serving.


The spoils of potluck

IMG_2975.jpg
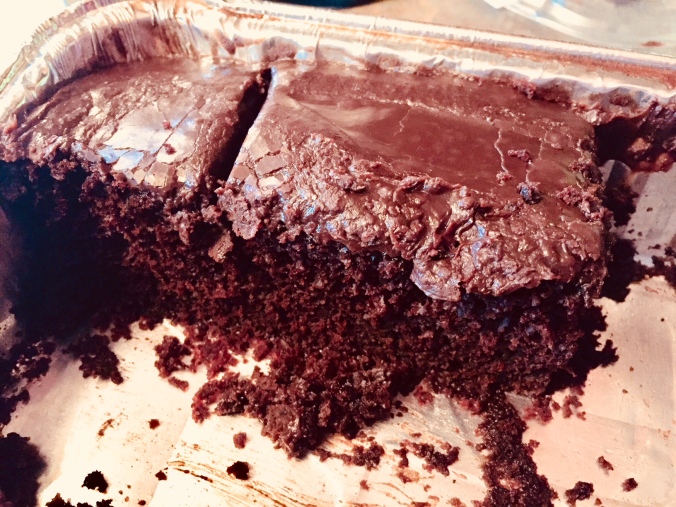
No, this isn’t the prettiest food picture I’ve ever posted. Far from it. But it’s the best I could do without some major doctoring in the wake of a school potluck.

This week is Teacher Appreciation Week, so the first-grade paraprofessionals at Prairie Elementary School put together a salad-dessert luncheon for our respective teachers. I had signed up to bring a dessert, and debated over what to tote to school. But eventually, my own love for chocolate won out.

Not too long ago, I combined my longtime favorite cake recipe with a recently discovered frosting recipe. In my opinion, the result was magical — and so easy to make! Since there was still some cake left (the dessert selection was glorious!) after the lunching was done, I moved the pan to the staff lounge. When school was dismissed, I stopped to pick up the “spoils of the potluck” as pictured above, and several people asked for the recipe, so now I am obliging.

The cake is a classic — Crazy Cake, a recipe that I’m sure is in many a church cookbook. I love it because I almost always have all the ingredients I need in my cupboard — it doesn’t even require eggs! — and I don’t have to get out my mixer or dirty a bowl. The ingredients are just dumped into and mixed up in the pan in which it is baked. The resulting cake is always moist, too.

The frosting is also a classic, but something I only recently tried — a ganache. Also incredibly easy.

Crazy Cake with Crazy Good Ganache Frosting

3 cups flour

2 cups sugar

6 tablespoons cocoa

1 (scant) teaspoon salt

2 teaspoons baking soda

2 tablespoons vanilla

2/3 cup vegetable oil

2 tablespoons vinegar

2 cups cold water

For frosting:

1 cup heavy cream

12 ounces semisweet chocolate chips

1 teaspoon vanilla

In a zip-lock plastic bag, mix the flour, sugar, cocoa, salt and soda. Shake to combine. Dump the mixture into a 9- by 13-inch pan. (Ingredients can also be dumped right into the pan, but I like the bag method; I sometimes mix the dry ingredients in advance.)

Make 3 indentations in the dry mixture. In the first, place the 2 tablespoons vanilla; in the second, 2/3 cup oil; in the third, 2 tablespoons vinegar. Pour the 2 cups cold water over the top and mix well, using a rubber spatula to get all the dry ingredients out of the bottom and corners. You will see bubbles form as a result of the vinegar and baking soda interaction; this is what makes the cake rise.

Bake at 350 degrees for 45-50 minutes. Make sure the cake is set in the middle.

Let cake cool.

For the frosting, heat the cream in a microwave safe bowl for about 2 minutes, just until boiling. Pour the chocolate chips into the cream, making sure they are all submerged. Let set for 5 minutes. Stir in the vanilla and continue to stir vigorously until the melted chips incorporate into the cream and the mixture is smooth. Pour over top of cake.